
Roughly 1 in 4 ADUs in California are believed to be unpermitted, often built without inspections or proper approvals in response to rising housing costs and limited space.
As cities work to expand affordable housing options, many homeowners are realizing that their illegal ADU could be both a liability and a missed opportunity.
As an expert in home inspections, I’ve seen firsthand how common it is for backyard conversions, garage apartments, or basement units to be built without the right permits.
These unpermitted ADUs often start as well-meaning projects but can lead to serious safety risks, insurance gaps, and legal headaches if not brought into compliance.
In this article, we’ll walk through how to legalize an unpermitted ADU, covering:
- What defines an unpermitted ADU and why it’s risky to leave it illegal.
- How to begin the process with a private inspection and code assessment.
- What’s involved in preparing plans and submitting for an ADU permit.
- How local laws like California’s AB 2533 support legalization efforts.
- The financial and safety benefits of having a legal, insurable ADU.
By the end of this post, you’ll know the exact steps to permit an unpermitted ADU safely and legally and how to turn a code risk into a valuable, compliant part of your property.
Understanding What Makes an ADU Unpermitted
What Is an Unpermitted ADU?
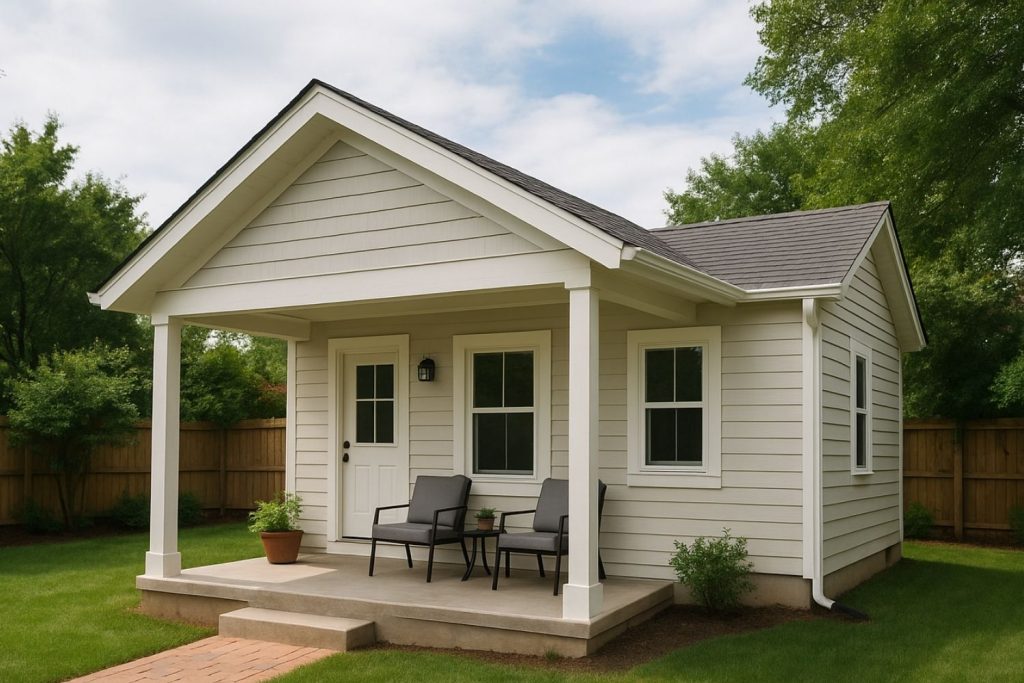
An unpermitted ADU is a secondary housing unit, such as a converted garage, basement apartment, or standalone backyard cottage, that was built or renovated without securing the necessary ADU permits or undergoing required inspections.
These units often bypass city planning and building departments, which means they may not comply with current safety or zoning standards.
Risks of an Illegal ADU
Operating an illegal ADU can create serious problems for homeowners:
- Safety Hazards: Without inspections, issues such as faulty electrical wiring or inadequate exits may go unnoticed.
- Insurance Gaps: Insurance companies may deny claims if damage occurs in an unpermitted unit.
- Fines and Enforcement: Cities can issue steep fines or require complete removal of the unit.
- Sale Complications: Unpermitted units can complicate property sales or reduce home value.
Common Examples I’ve Seen
As someone who inspects homes regularly, I’ve seen many ADUs fail due to missing smoke detectors, no emergency exit windows, and improperly installed electrical panels. These are not just code violations; they can be life-threatening in an emergency.
Initial Assessment and Inspection
Why Start With a Private Inspection
Before contacting the city, it’s smart to bring in a licensed inspector or contractor for a private assessment. This avoids triggering code enforcement while giving you a clear picture of what needs fixing. It also helps you build a roadmap for bringing the unit into compliance.
What Inspectors Look For
During a private inspection, the focus is on safety and code compliance. Inspectors typically check:
- Electrical panels and wiring.
- Plumbing systems and drainage.
- Egress windows and emergency exits.
- Ventilation and natural light.
- Smoke and carbon monoxide detectors.
- Structural integrity (walls, ceilings, and foundations).
Creating a Roadmap
Once the inspection is complete, you’ll have a list of deficiencies and potential upgrades. This helps estimate costs and determine if your unit qualifies for local amnesty or streamlined legalization programs that prioritize safety over full modern code compliance.
Preparing the Plans and Permit Application
Gathering Documentation
If you have any old building permits, photos, or records showing when the ADU was built, gather them now. These can be used to prove the unit existed before certain cutoff dates, which may qualify it for amnesty programs like those in California.
Hiring a Qualified Designer or Architect
To meet zoning and building code requirements, you’ll likely need a professional to draft plans.
Doing so will streamline the process, help you avoid costly mistakes, and ensure permit approval as quickly as possible.
Submitting the Permit Application
Your complete application will include:
- Site plans and floor plans.
- Structural and safety details.
- Documentation for amnesty eligibility (if applicable).
- A statement of intent to legalize the unit.
Submit your application to the local planning or building department. Some cities may route your plans through multiple departments for review.
The Review and Inspection Process
Multi-Agency Review
Once submitted, your application may be reviewed by several departments:
- Building Department: Structural safety and code compliance
- Fire Department: Emergency access and smoke detectors
- Health Department: Sanitation, plumbing, and ventilation
- Planning/Zoning: Lot coverage, height, and setbacks
Each department ensures that the unit meets the respective standards.
Streamlined and Amnesty Programs
Cities such as Los Angeles, Oakland, and Mountain View have created programs to simplify the process. These programs often waive penalties and allow units to be legalized as long as they meet basic safety requirements.
California Example: AB 2533
California’s AB 2533 makes it harder for local governments to deny legalization based solely on the fact that a unit was originally unpermitted. As long as there are no serious health or safety hazards, cities must allow the unit to be legalized.
Many ADU builders, such as LADU, specialize in this legalization process. I spoke with Babak Mortazavi, the founder of LADU, who said “homeowners with unpermitted ADUs need to take advantage of AB2533, it allows them to avoid penalties for their original unpermitted ADU, as long as they follow the proper steps to rectify the situation.”
Making Required Corrections
Typical Corrections Needed
Most unpermitted ADUs don’t need to be torn down. Common upgrades that bring units into compliance include:
- Installing smoke and carbon monoxide detectors.
- Adding GFCI outlets in kitchens and bathrooms.
- Providing emergency egress windows in bedrooms.
- Fixing minor plumbing leaks or drainage issues.
- Improving ventilation or HVAC systems.
Cost Considerations
Costs can vary widely depending on the scope of work. A simple retrofit with smoke detectors and electrical fixes might cost a few thousand dollars. More extensive repairs such as plumbing or structural work can add up. Early planning with a qualified contractor helps reduce surprises.
Levi Construction, an ADU builder serving Los Angeles, Orange, and Ventura counties in California, advises planning for unexpected costs, such as asbestos removal, utility upgrades, mold remediation, and foundation reinforcement, early in the process.
Special Zones and Exceptions
If your property is in a coastal, hillside, or historic zone, additional rules may apply. These areas may require extra documentation or design review, but public hearings are usually not needed for ADU legalization.
Complying With Local Zoning Laws
Zoning Factors To Check
Even if your ADU is structurally sound, it must comply with zoning laws. Common requirements include:
- Minimum lot size.
- Setback distances from property lines.
- Maximum unit height and square footage.
- On-site parking requirements.
- Limits on the number of occupants.
Regional Differences
In New York City, Local Laws 126 and 127 provide a 10-year path to legalize basement and cellar units, with safety and zoning milestones along the way. New York’s Plus One ADU Program also enables a smooth compliance process.
In New Jersey, requirements vary by town, but most require full compliance with zoning and building codes.
When Zoning Blocks Legalization
If your ADU violates zoning rules, you may have options:
- Apply for a variance or zoning exception.
- Modify the unit’s layout to comply.
- Participate in a local pilot or amnesty program.
Cities are increasingly open to creative solutions, especially when the unit provides much-needed housing.
Final Approval and Legalization
Final Inspection
After corrections are made, a city inspector will visit to confirm compliance. They’ll check that all safety features are installed correctly and that previous violations have been addressed.
Certificate of Occupancy and Registration
Once the unit passes inspection, you’ll receive a certificate of occupancy. This document officially confirms that the unit is legal and safe for habitation. In some cities, you may also need to register the ADU with the local housing department.
Owner-Occupancy and Rental Rules
Some jurisdictions require the property owner to live on-site, especially if the ADU is being rented. Others may limit short-term rentals or require minimum lease lengths. Be sure to review your city’s rental guidelines before listing the unit.
Benefits of Legalizing an ADU
Avoiding Penalties and Enforcement
Legal ADUs are protected from fines, forced removal, or tenant displacement. You gain peace of mind knowing your unit complies with the law.
Improved Property Value and Insurance
A legal ADU increases your home’s value and allows you to insure the unit properly. If something goes wrong, your insurance will cover the damages.
Rental Income and Affordable Housing
Legal ADUs can be rented out, providing extra income. In many cities, they play a key role in increasing affordable housing options for renters.
Legal Status Starts With a Plan
Legalizing an unpermitted ADU is a process that starts with a careful inspection and ends with official approval. Most units only require targeted safety upgrades, not complete reconstruction.
Laws such as California’s AB 2533 and New York’s Plus One ADU Program make the path to compliance more accessible than ever.
As an inspector, I’ve seen how a well-structured plan can turn a risky, illegal ADU into a safe and valuable part of your property.
If you’re not sure where to begin, your local permitting office or a certified inspector can help you take that first step toward legal, worry-free housing.
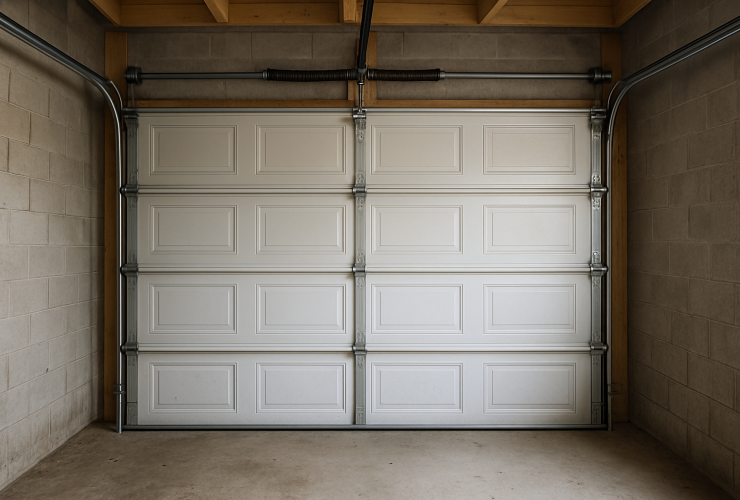
Every year, more than 30,000 people in the U.S. suffer injuries related to garage doors, many of them due to neglected maintenance or faulty systems. These incidents often stem from issues that could have been spotted early with a simple inspection.
This guide walks you through a practical Garage Door Repair Checklist, helping you understand how to repair a garage door, what to look for during inspections, and which common garage door repair issues require immediate attention.
Whether your door is making strange noises or not closing properly, this checklist will help you stay ahead of problems before they get worse.
- How to identify and address common garage door repair issues during routine inspections
- What to look for when checking door panels, tracks, rollers, and weather seals
- Which components are safe to handle on your own and when to call a professional
- How proper maintenance improves energy efficiency and extends your door’s lifespan
- Tips for testing safety sensors, automation systems, and overall door functionality
By the end of this article, you’ll know how to confidently assess your garage door’s condition, handle basic upkeep, and recognize the warning signs that it’s time to bring in a certified technician.
Visual Inspection: The First Step to Repair
A visual inspection is often the quickest way to catch early signs of trouble. Regular checks can prevent minor damage from turning into costly repairs.
Door Panels and Surface Condition
Start examining the door panels for dents, cracks, rust, or peeling paint. These signs of wear can affect the door’s structural integrity and appearance. For wooden doors, look for signs of rot or insect damage. According to A Plus Garage Doors, a garage door company in Glendale, Arizona, repainting or sealing may be necessary to protect the surface from weather exposure.
Weatherstripping and Seals
Inspect the bottom and side seals of the door. Look for gaps, tears, or compression that no longer creates a tight seal. Damaged weatherstripping can let in drafts, moisture, and pests, reducing your garage’s energy efficiency. Replacing worn seals is a simple upgrade that improves insulation and performance.
Track and Roller System
The track and roller system guides the garage door during opening and closing. Damage or misalignment in this area can lead to jerky movement or derailment.
Track Alignment and Obstructions
Check both vertical and horizontal tracks for bends, dents, or rust. Clear out any debris or buildup that might obstruct the rollers. Misaligned tracks can make the door bind or come off track, presenting a safety hazard.
Roller Wear and Lubrication
Rollers should move smoothly within the track grooves. Look for signs of wear like chipping or sticking. If they’re noisy or not rotating freely, apply a silicone-based lubricant. If rollers are damaged, consider replacing them with nylon-coated steel rollers for quieter, longer-lasting performance.
Spring System: High-Risk, High Impact
Garage door springs carry the weight of the door. When these components fail, it can cause the door to slam shut or become impossible to lift. According to Overhead Door Wilmington, the spring systems are a common point of failure.
Signs of Failing Springs
To test spring tension, disconnect the automatic opener and manually lift the door halfway. If it doesn’t stay in place, the springs may be worn or broken. Look for signs of rust, cracks, or gaps in the coils which indicate fatigue.
When to Call a Professional
Spring repairs are extremely dangerous due to the high tension involved. Attempting DIY work can lead to severe injury. Always call a trained technician for spring replacement or adjustment.
Cables, Pulleys, and Bearing Plates
These parts help lift and balance the door. If damaged, they can snap and cause injury or property damage.
Inspecting for Frays or Rust
Visually check the lift cables near the bottom brackets for fraying, rust, or signs of wear. Inspect pulleys and end bearing plates for cracking or corrosion. These areas are under constant tension and need to be in top condition.
Dangers of DIY Repairs
Like springs, cables and pulleys should not be repaired without proper tools and training. All Four Seasons Garages recommends avoiding DIY repairs, so be sure to consult a professional before attempting to fix it yourself.
Hinges, Struts, and Hardware Tightening
Loose or failing hardware can lead to misalignment, noise, and breakdowns.
Checking Hinges and Struts
Inspect the hinges that connect door panels for cracks, rust, or deformation. Bent or broken hinges should be replaced. Struts run horizontally across the door and provide structural support. Look for sagging or rust that could compromise strength.
Tightening Bolts and Fasteners
Use a socket wrench to check and tighten all bolts and screws on the tracks, brackets, and door hardware. Loose fasteners can cause vibration, misalignment, and eventual failure of components.
Testing Safety Sensors and Automation
Automation systems and safety sensors prevent accidents and ensure smooth operation. These should be tested regularly.
Sensor Alignment and Cleaning
Photo-eye sensors located near the bottom of the door must be clean and facing each other. Wipe the lenses with a soft cloth and make sure they are aligned. If the sensors are blocked or misaligned, the door may not close properly.
Testing Auto-Reverse and Remote Functions
Place a small object, like a roll of paper towels, in the door’s path and close it. The door should reverse immediately upon contact. Test the remote control and wall switch to confirm they operate correctly. Replace batteries if needed.
Lubrication: Reducing Friction and Noise
Friction is a leading cause of wear in garage door components. Lubrication keeps parts moving smoothly and quietly.
Where and What to Lubricate
Apply a silicone-based lubricant to:
- Rollers (avoid nylon wheels)
- Hinges
- Pulleys
- Bearings
- Tracks (lightly, if needed)
Lubricate every three to six months depending on use.
What to Avoid
Do not use grease or oil-based products like WD-40. These substances attract dust and grime, which can cause components to gum up and wear faster.
Functional Testing and Balance
Testing your garage door in both manual and automatic modes can reveal hidden problems before they escalate.
Manual and Automatic Operation
Disengage the opener and lift the door manually. It should move smoothly and stay open when halfway up. Reconnect the opener and test the full open and close cycle, watching for hesitation or jerky movement.
Listening for Unusual Noises
Grinding, squeaking, or banging sounds often signal worn or loose components. Pinpoint the source and inspect the related hardware for issues.
Environmental and Safety Checks
The garage environment influences door performance. Moisture, pests, and clutter can all create problems.
Moisture, Mold, and Pest Signs
Look for rusted parts, mold near seals, or signs of rodents nesting around the tracks and opener. These can damage components and compromise safety.
Obstruction-Free Operation
Clear stored items away from the door path and tracks. Objects that block movement can cause strain on the opener or lead to door misalignment.
When to Call a Garage Door Repair Company
Some repairs are too risky or complex to handle without professional help. Knowing when to call in an expert can prevent injury and further damage.
High-Tension Parts and Complex Repairs
Leave repairs involving the following to certified technicians:
- Springs (torsion or extension)
- Lift cables and pulleys
- Track realignment or replacement
- Opener motor or electrical issues
These parts operate under high tension or require specialized tools and training to repair safely.
Warning Signs You Shouldn’t Ignore
If your door:
- Sags or appears uneven
- Makes loud bangs or grinding noises
- Fails to open or close consistently
- Has repeated malfunctions despite DIY attempts
It’s time to schedule professional service to diagnose and fix the problem before it worsens.
Protect Your Garage with Regular Maintenance
A well-maintained garage door is safer, quieter, and more reliable. Following this Garage Door Repair Checklist helps you stay on top of common garage door repair issues before they become expensive emergencies. Here’s what to keep in mind:
- Inspect your garage door quarterly for wear, damage, or misalignment
- Lubricate moving parts regularly using silicone-based products
- Test safety sensors and auto-reverse features for proper function
- Tighten all fasteners and check structural components like struts and hinges
- Call a professional for any high-tension or complex repairs
If your garage door shows signs of wear or isn’t working as it should, don’t wait. Schedule a professional inspection to keep your home safe and secure.

In the scorching heat of the U.S. Southwest, climbing onto rooftops to inspect solar panels used to be a risky, time-consuming job, but today, drones equipped with high-resolution and thermal cameras are changing everything.
In fact, drone inspections can now cover massive solar arrays in a fraction of the time, sometimes up to 50 megawatts in a single day, without you ever stepping foot on a ladder.
As a home inspector with years of experience across sunbaked rooftops and dusty solar farms, I’ve seen firsthand how drones for solar panel inspection have transformed the way we work.
They make inspections faster, safer, and far more accurate, helping homeowners and solar operators catch problems early and keep their systems running at peak efficiency.
In this article, we’ll explore:
- What drones bring to solar inspections and why they’re superior to manual methods.
- The types of issues drones can detect, from cracked panels to hidden hotspots.
- How thermal imaging helps identify problems invisible to the naked eye.
- The time and cost savings that come with using drones.
- The tools and skills you need to get started with drone inspections.
By the end of this post, you’ll understand exactly how drones are revolutionizing solar panel inspections and how you can use them to boost safety, cut costs, and improve solar system performance.
Why Drones Make Solar Inspections Easier and Safer
In my years as a home inspector working across the sun-drenched rooftops and sprawling solar farms of the U.S. Southwest, one thing has become clear: safety and efficiency are everything.
Climbing steep roofs with a clipboard and camera in hand used to be the norm, but drones have changed all that. Today, drones for solar panel inspection are not only safer but also drastically more efficient and accurate.
Reaching Difficult Areas Without Climbing
- No need to walk on fragile rooftops, which reduces the risk of damaging shingles or solar panels.
- Inspections can be done from the ground, keeping inspectors safe and systems unharmed.
- Drones can hover and maneuver precisely over building-integrated solar panels or tight spaces.
Avoiding System Downtime
- No interruption to energy production, which means no loss in revenue.
- Real-time data collection lets you assess panel performance under actual working conditions.
- Maintenance decisions can be made without halting system operations.
Reducing Labor and Time
- Fewer personnel are needed, lowering labor costs.
- Automated flight paths allow for repeatable, consistent inspections.
- Results are available almost immediately, accelerating the decision-making process.
What Drones Look for During a Solar Inspection
Drones for solar panel inspection are equipped with high-resolution RGB and thermal cameras. These tools help detect a wide range of issues that affect solar performance.
Detecting Cracks and Broken Panels
- Cracks, chips, or shattered glass on panels.
- Misaligned or missing components.
- Discoloration or corrosion on panel surfaces.
These kinds of defects can reduce energy output and, if left unchecked, lead to more serious failures.
Spotting Hotspots With Thermal Imaging
- Hotspots can indicate failing cells, loose connections, or internal wiring problems.
- Thermal cameras, such as those from FLIR or Zenmuse, detect these issues before they cause panel failure.
- Identifying thermal anomalies early helps prevent DC losses and costly repairs.
Identifying Dust and Debris Buildup
- Drones can scan entire arrays to identify where buildup is concentrated.
- This data helps create targeted cleaning schedules, saving water and labor.
- Cleaner panels mean better energy performance and longer system life.

Tools and Technology Behind Drone Inspections
To get the most from drone inspections, you need the right equipment and software.
Camera Types and Sensor Payloads
- RGB (visual) cameras: Capture high-resolution images of the panels to identify physical damage.
- Thermal infrared cameras: Detect temperature differences that reveal electrical faults or hotspots.
Brands like FLIR and DJI’s Zenmuse line are trusted across the industry for their accuracy and reliability.
Flight Planning and GPS Mapping
- Pre-programmed routes ensure complete and repeatable coverage of each solar array.
- GPS coordinates help pinpoint the exact location of any fault, making repairs faster and more accurate.
- Real-time mapping helps operators monitor inspection progress and data collection as it happens.
AI and Real-Time Defect Detection
- AI algorithms scan images for anomalies like cracks, hotspots, or soiling.
- Immediate alerts allow inspectors to take action on critical issues right away.
- This reduces the need for manual image review and speeds up reporting.
How To Use Drone Data To Improve Solar Performance
Geo-Referenced Reports for Targeted Repairs
- Repair crews know exactly where to go and what to fix.
- No wasting time searching for a cracked panel across a 10-acre array.
- Reports can be shared digitally with maintenance teams, speeding up the workflow.
Tracking System Health Over Time
- Compare past and present data to spot deteriorating conditions.
- Identify recurring issues before they become serious problems.
- Use trend data to plan system upgrades or replacements.
Verifying Maintenance and Repairs
- Visual and thermal images show if hotspots are gone and panels are clean.
- This builds confidence in the repair process and ensures optimal performance.
- Helps validate warranty claims or service agreements.
Real-World Benefits I’ve Seen Firsthand
Saving Time on Large Rooftop Installs
On a recent commercial solar panel inspection job:
- We covered the entire roof without setting foot on it.
- The client had a full report with images and thermal maps by the next morning.
Finding Hidden Faults Missed by Manual Checks
A homeowner was experiencing reduced power generation and was unable to identify the cause.
- It turned out to be a failing cell that was slowly reducing output.
- The homeowner was able to replace the panel under warranty before it failed completely.
Helping Homeowners Avoid Expensive Repairs
For another homeowner experiencing loss of power:
- The drone scan showed exactly which panels were affected.
- A targeted cleaning brought the system back to full performance, saving hundreds in lost energy.
Drones for Solar Panel Inspection Are Shaping the Future
Drones for solar panel inspection have completely redefined how we maintain and optimize solar energy systems. From quickly spotting cracks and hotspots to generating precise, geo-referenced reports, drones bring unmatched speed, safety, and accuracy to the job.
With the right tools, like thermal cameras, GPS flight planning, and AI-powered defect detection, inspectors can cover more ground in less time and catch problems before they become costly failures.
As someone who’s spent years inspecting systems across the sunbaked rooftops and dusty solar farms of the Southwest, I can confidently say that drones aren’t just a convenience; they’re a game-changer.
Whether you’re a homeowner, solar technician, or asset manager, integrating drone inspections into your workflow will help you protect your investment and keep your solar array performing at its best.

In the scorching heat of the Southwest, where HVAC systems often run year-round, it’s no surprise that over 75% of HVAC failures are caused by neglected maintenance.
As a seasoned home inspector in this climate, I’ve seen firsthand how a thorough HVAC inspection checklist can mean the difference between a comfortable summer and a costly emergency repair.
Whether you’re a homeowner trying to stay ahead of issues or a fellow inspector aiming for thoroughness, understanding what goes into an HVAC inspection is essential.
A well-structured checklist not only helps maintain comfort and efficiency but also extends the lifespan of your system and ensures safety in every season. This guide breaks down everything you need to know:
- Why regular HVAC inspections are especially critical in hot, dry regions like the Southwest.
- What a complete HVAC inspection checklist includes, from documentation to system components.
- How using a checklist helps prevent unexpected breakdowns and expensive repairs.
- The essential elements every residential and commercial HVAC checklist should cover.
- Where to find and how to use a printable HVAC inspection checklist template or digital version.
By the end of this article, you’ll walk away with a full understanding of how to use an HVAC inspection checklist, whether it’s for your own home, a client’s property, or a commercial space.
What Is an HVAC Inspection Checklist?
An HVAC inspection checklist is a structured tool used to evaluate the condition, efficiency, and safety of heating, ventilation, and air conditioning systems. It ensures every component is reviewed systematically, reducing the chance of missing critical issues.
As a home inspector in the Southwest, I can’t stress enough how vital it is to use a checklist, especially when temperatures soar and systems are pushed to their limits.
Residential vs. Commercial Checklists
While the core principles are the same, residential and commercial HVAC inspection checklists differ in scope and complexity:
- Residential HVAC inspection checklist: Focuses on comfort systems for single-family homes or small multi-family units. These checklists often include furnace checks, air conditioner performance, air filter conditions, ductwork, and thermostat accuracy.
- Commercial HVAC inspection checklist: Covers larger, more complex systems like rooftop units, chillers, and building automation controls. These require additional checks related to zoning, energy management, and code compliance.
Digital vs. Printable Formats
Depending on your workflow, you can choose between digital and printable formats:
- HVAC inspection checklist apps: Great for field inspectors, allowing real-time data entry, photo upload, and report generation.
- Printable HVAC inspection checklist templates: Ideal for homeowners or inspectors who prefer paper-based records. You can download a free printable HVAC inspection checklist template or a residential HVAC inspection checklist PDF for quick reference.
- HVAC inspection checklist Excel templates: Useful for tracking multiple inspections or properties over time. An Excel printable HVAC inspection checklist template lets you sort, filter, and archive inspection data easily.
Core Components of a Residential HVAC Inspection Checklist
Here’s what I include on every residential HVAC inspection checklist, based on years of fieldwork in the Southwest:
General Information and Documentation
- Customer name and contact information
- Inspection date and property address
- Inspector name and license number
- System type (split, packaged, mini-split, etc.)
- Previous service history and known issues
Heating and Cooling Components
- Burners, flame sensors, and igniters for proper ignition
- Heat exchangers for cracks or corrosion
- Evaporator and condenser coils for dirt buildup
- Blower motors and fan blades for balance and speed control
- Thermostat calibration and setting accuracy
Air Filters and Airflow
- Inspect and replace filters as needed
- Check airflow at registers and grilles
- Adjust dampers or vents for even distribution
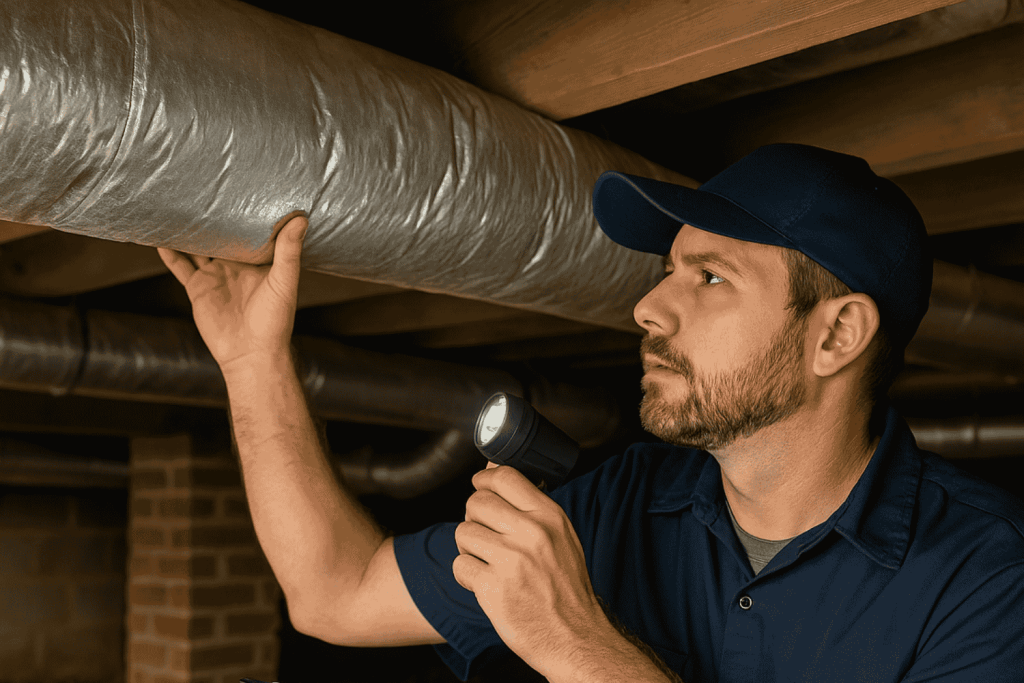
Ductwork and Ventilation
- Inspect for disconnected sections, leaks, or crushed ducts
- Ensure duct insulation is intact
- Verify return and supply balance across rooms
Electrical Systems and Controls
- Verify wire connections, fuses, and grounding
- Test thermostat response and control panel function
- Check safety shutoff switches and relays
Refrigerant System
- Measure refrigerant pressure and charge level
- Inspect refrigerant lines for insulation and leaks
- Check flare connections and service valves
Drainage and Condensate Management
- Flush condensate lines and inspect pans for rust or debris
- Check condensate pumps for proper operation
Motors, Belts, and Lubrication
- Inspect belt tension and alignment
- Lubricate motors and bearings where applicable
- Test motor amperage and operation
Air Quality Equipment
- Inspect and clean humidifiers, dehumidifiers, and air purifiers
- Test indoor air quality (IAQ) sensors
When and How Often To Inspect Your HVAC System
In my experience, the best time to inspect your HVAC system is just before peak seasons (spring and fall). This ensures your system is ready for summer cooling or winter heating.
Creating a Maintenance Schedule
Set reminders to inspect twice a year. Use a home maintenance calendar or app to track inspections and filter changes. Homeowners can even integrate this into seasonal chores like roof checks or gutter cleaning.
Updating the Checklist
As systems age or are upgraded, update your HVAC inspection checklist template to reflect new components or changes in code. For example, if you add a whole-home air purifier or switch to a heat pump, your checklist should evolve accordingly.
Tools and Templates for Inspectors and Homeowners
Printable HVAC Inspection Checklist Templates
Download a free printable HVAC inspection checklist template for basic residential inspections. You can find a HVAC system inspection checklist in PDF format that works well for homeowners wanting a physical record.
HVAC Inspection Checklist in Excel
An HVAC inspection checklist Excel template is perfect for managing multiple properties or scheduled inspections. You can log each visit, track system performance over time, and even generate maintenance reports.
HVAC Inspection Checklist Apps
For professionals, using a HVAC inspection checklist app speeds up fieldwork, offers real-time reporting, and allows you to send digital reports to clients immediately.
Common Issues Identified During Inspections
Safety Hazards
- Carbon monoxide leaks from cracked heat exchangers
- Frayed or exposed wiring that could spark a fire
- Blocked exhaust vents or gas leaks
Efficiency Problems
- Dirty or clogged filters limiting airflow
- Low refrigerant levels causing poor cooling
- Obstructed or leaky ducts reducing system output
Signs of Wear and Aging
- Rust on coils or pans
- Noisy motors or loose belts
- Frequent cycling or slow system response
Stay Ahead of the Game With a Reliable HVAC Inspection Checklist
In the demanding climate of the Southwest, proactive HVAC maintenance isn’t just smart; it’s essential. As we’ve explored throughout this guide, a thorough HVAC inspection checklist empowers homeowners and inspectors alike to ensure system safety, efficiency, and longevity.
From checking air filters and ductwork to inspecting refrigerant lines and electrical controls, each component plays a critical role in keeping your indoor environment comfortable and your energy bills manageable.
Whether you’re performing a seasonal check or preparing a property for sale, having a structured approach ensures nothing is overlooked. With today’s tools, such as printable templates, Excel trackers, and mobile apps, you can tailor your inspection process to fit your workflow perfectly.
Don’t wait for a system failure to take action. Equip yourself with the right resources to inspect with confidence and clarity. Start by downloading a free printable HVAC inspection checklist template and take the first step toward smarter HVAC maintenance today.

In the Southwest—particularly in dynamic cities like Phoenix, Tucson, Albuquerque, Las Vegas, and El Paso—home inspections play a pivotal role in shaping real estate transactions. From identifying hidden issues to influencing purchase negotiations, inspections provide buyers and sellers with critical insights before finalizing a deal. Understanding the greater impact of these inspections can lead to more confident offers, smoother closings, and successful homeownership experiences.
What Is a Home Inspection?
A home inspection is a thorough examination of a property’s overall condition conducted by a certified professional. Inspectors examine the home’s key systems—like plumbing, electrical, foundation, and roofing—to spot any concerns that may affect the property’s value or safety. For those exploring home buying in Phoenix or Las Vegas—or seeking practical insights in El Paso, Tucson, or Albuquerque—an inspection is essential for shining a light on potential repair needs and ensuring you’re getting a fair deal.
How Home Inspections Affect Negotiations
When significant issues arise during the inspection, buyers and sellers can use the findings to negotiate:
- Price Adjustments: Buyers may request a lower purchase price if expensive fixes are discovered.
- Repairs or Concessions: Sellers might offer repair credits or make agreed-upon fixes before closing.
- Enhanced Bargaining Power: Both sides can enter discussions with clearer knowledge of the home’s true state.
Special Considerations for the Southwest
Living in arid regions like Phoenix, Las Vegas, and El Paso brings unique climate-related issues. When scheduling your inspection, keep an eye out for:
- Roof Wear and Sun Damage: Persistent sunshine can degrade roofing materials faster than in cooler regions.
- Foundation Cracks and Settling: Dry desert soils can expand and contract, leading to shifting foundations.
- HVAC Efficiency: Air conditioning systems work year-round in many Southwest homes, making HVAC condition a top priority.
Addressing these issues upfront helps ensure smoother real estate experiences across Arizona, New Mexico, Nevada, and West Texas.
Inspection vs. Appraisal
It’s easy to confuse home inspections with appraisals, but they serve different purposes:
- Inspection: Focuses on identifying potential defects, safety hazards, and future maintenance concerns.
- Appraisal: Determines the fair market value of the home based on the property’s location, age, and features.
Navigating a Competitive Market
In fast-moving markets like Phoenix or Las Vegas, some buyers consider waiving the inspection contingency to make their offer more competitive. While tempting, this can carry significant risks:
- Major defects might go undetected, resulting in costly repairs.
- There’s reduced leverage to renegotiate after the deal closes.
Working with a qualified inspector is always a smarter path.
Real-World Examples
At SW Home Inspections, we’ve seen countless examples across the region where a quality inspection changed the outcome:
- Early Roof Repair Savings: A Phoenix family avoided a major expense after negotiating credits for sun-damaged shingles.
- Foundation Peace of Mind: A Tucson couple discovered minor cracks and ensured stabilization work was completed before closing.
- HVAC Discoveries in Albuquerque: One buyer negotiated a $6,000 credit after an inspector flagged a failing AC system during a hot July showing.
These real-life cases underscore how inspections protect your investment and support fair negotiations.
Conclusion & Next Steps
Home inspections are an essential step in any real estate transaction. By uncovering critical details and offering leverage at the negotiating table, inspections empower both buyers and sellers to proceed with clarity and confidence. Whether you’re shopping in Phoenix, relocating to Albuquerque, listing a property in Las Vegas, or investing in El Paso, expert inspection guidance can be your most valuable asset.

Finding a trustworthy and skilled home inspector can make all the difference when buying a property in Phoenix or Tucson. With so much on the line, it’s important to understand what credentials and qualities matter most. Below are straightforward tips to ensure you choose the right professional for your Southwest home inspections.

Licensing and Credentials in Phoenix and Tucson
Arizona sets specific requirements for licensing home inspectors to protect homeowners from unqualified professionals. According to the Arizona State Board of Technical Registration, new inspectors must complete 84 hours of approved training, pass the National Home Inspector Examination, and conduct 30 parallel inspections under a certified veteran inspector. Ensuring your inspector meets these standards is key to a thorough and compliant evaluation.
Professional organizations also demonstrate a high level of expertise. Membership in groups such as the American Society of Home Inspectors (ASHI) indicates that your inspector follows strict ethical guidelines and best practices. These associations hold their members to high standards of practice, so if you see their logos, it’s a good sign.
Key Qualities to Look For
Experience in Local Environments
Look for an inspector who has plenty of hands-on experience with the unique construction styles and climate challenges found in Phoenix and Tucson. Understanding desert-specific concerns, like heat damage and pest infestations, can help them spot potential problems before they turn into expensive repairs.
Insurance and Financial Protection
Ideally, your home inspector should carry errors and omissions (E&O) insurance. This coverage helps protect you if a significant issue is missed or incorrectly assessed—providing a layer of financial assurance as you move forward with your property purchase.
Clear, Detailed Communication
Written inspection reports should be straightforward, detailed, and easy to understand. A professional inspector will also be willing to answer your follow-up questions and clarify any concerns. Communication is critical because it ensures you fully grasp the condition of your home before closing.
Local Challenges and Opportunities in the Southwest

Phoenix and Tucson each have unique weather patterns and soil conditions that can create moisture or foundation issues. Additionally, with the region’s hot climate, air conditioning units often take a beating, so a knowledgeable inspector will check HVAC systems closely.
Termite or pest infestations are also more common in desert climates, so it’s helpful if your inspector has experience spotting materials or conditions that attract pests. Being aware of these regional nuances can save you from unexpected headaches down the line.
How to Evaluate and Select Your Home Inspector
The best way to find an excellent inspector is to do a bit of research:
- Ask for Recommendations: Your real estate agent may have trusted contacts. You can also consult friends, family, or online reviews to measure consistency in positive feedback.
- Review Sample Reports: Look for clarity and detail in their report samples so you know what to expect from your inspector.
- Verify Licenses: Confirm they have a valid Arizona home inspector license and relevant certifications before scheduling an appointment.
For additional insights, feel free to explore our post on Benefits of Including a Home Inspection in Your Real Estate Purchase to understand the potential advantages of hiring a qualified inspector early in the process.
Post-Inspection Support
A reliable inspector should offer consistent and supportive follow-up. Whether you have questions or need further explanation about your report, they should be available to help. This level of support is especially important if the inspection uncovers items requiring immediate attention.
Conclusion
Choosing the right home inspector is about more than just a checkbox in your Phoenix or Tucson home buying journey. You want a licensed professional who knows the specific desert challenges, provides clear communication, and stands by their findings with adequate insurance and follow-up support. By investing time in researching these qualities and credentials, you’ll be well on your way to making a confident and informed decision.